How to make a dry point etching using a Tetra Pak and a pasta maker
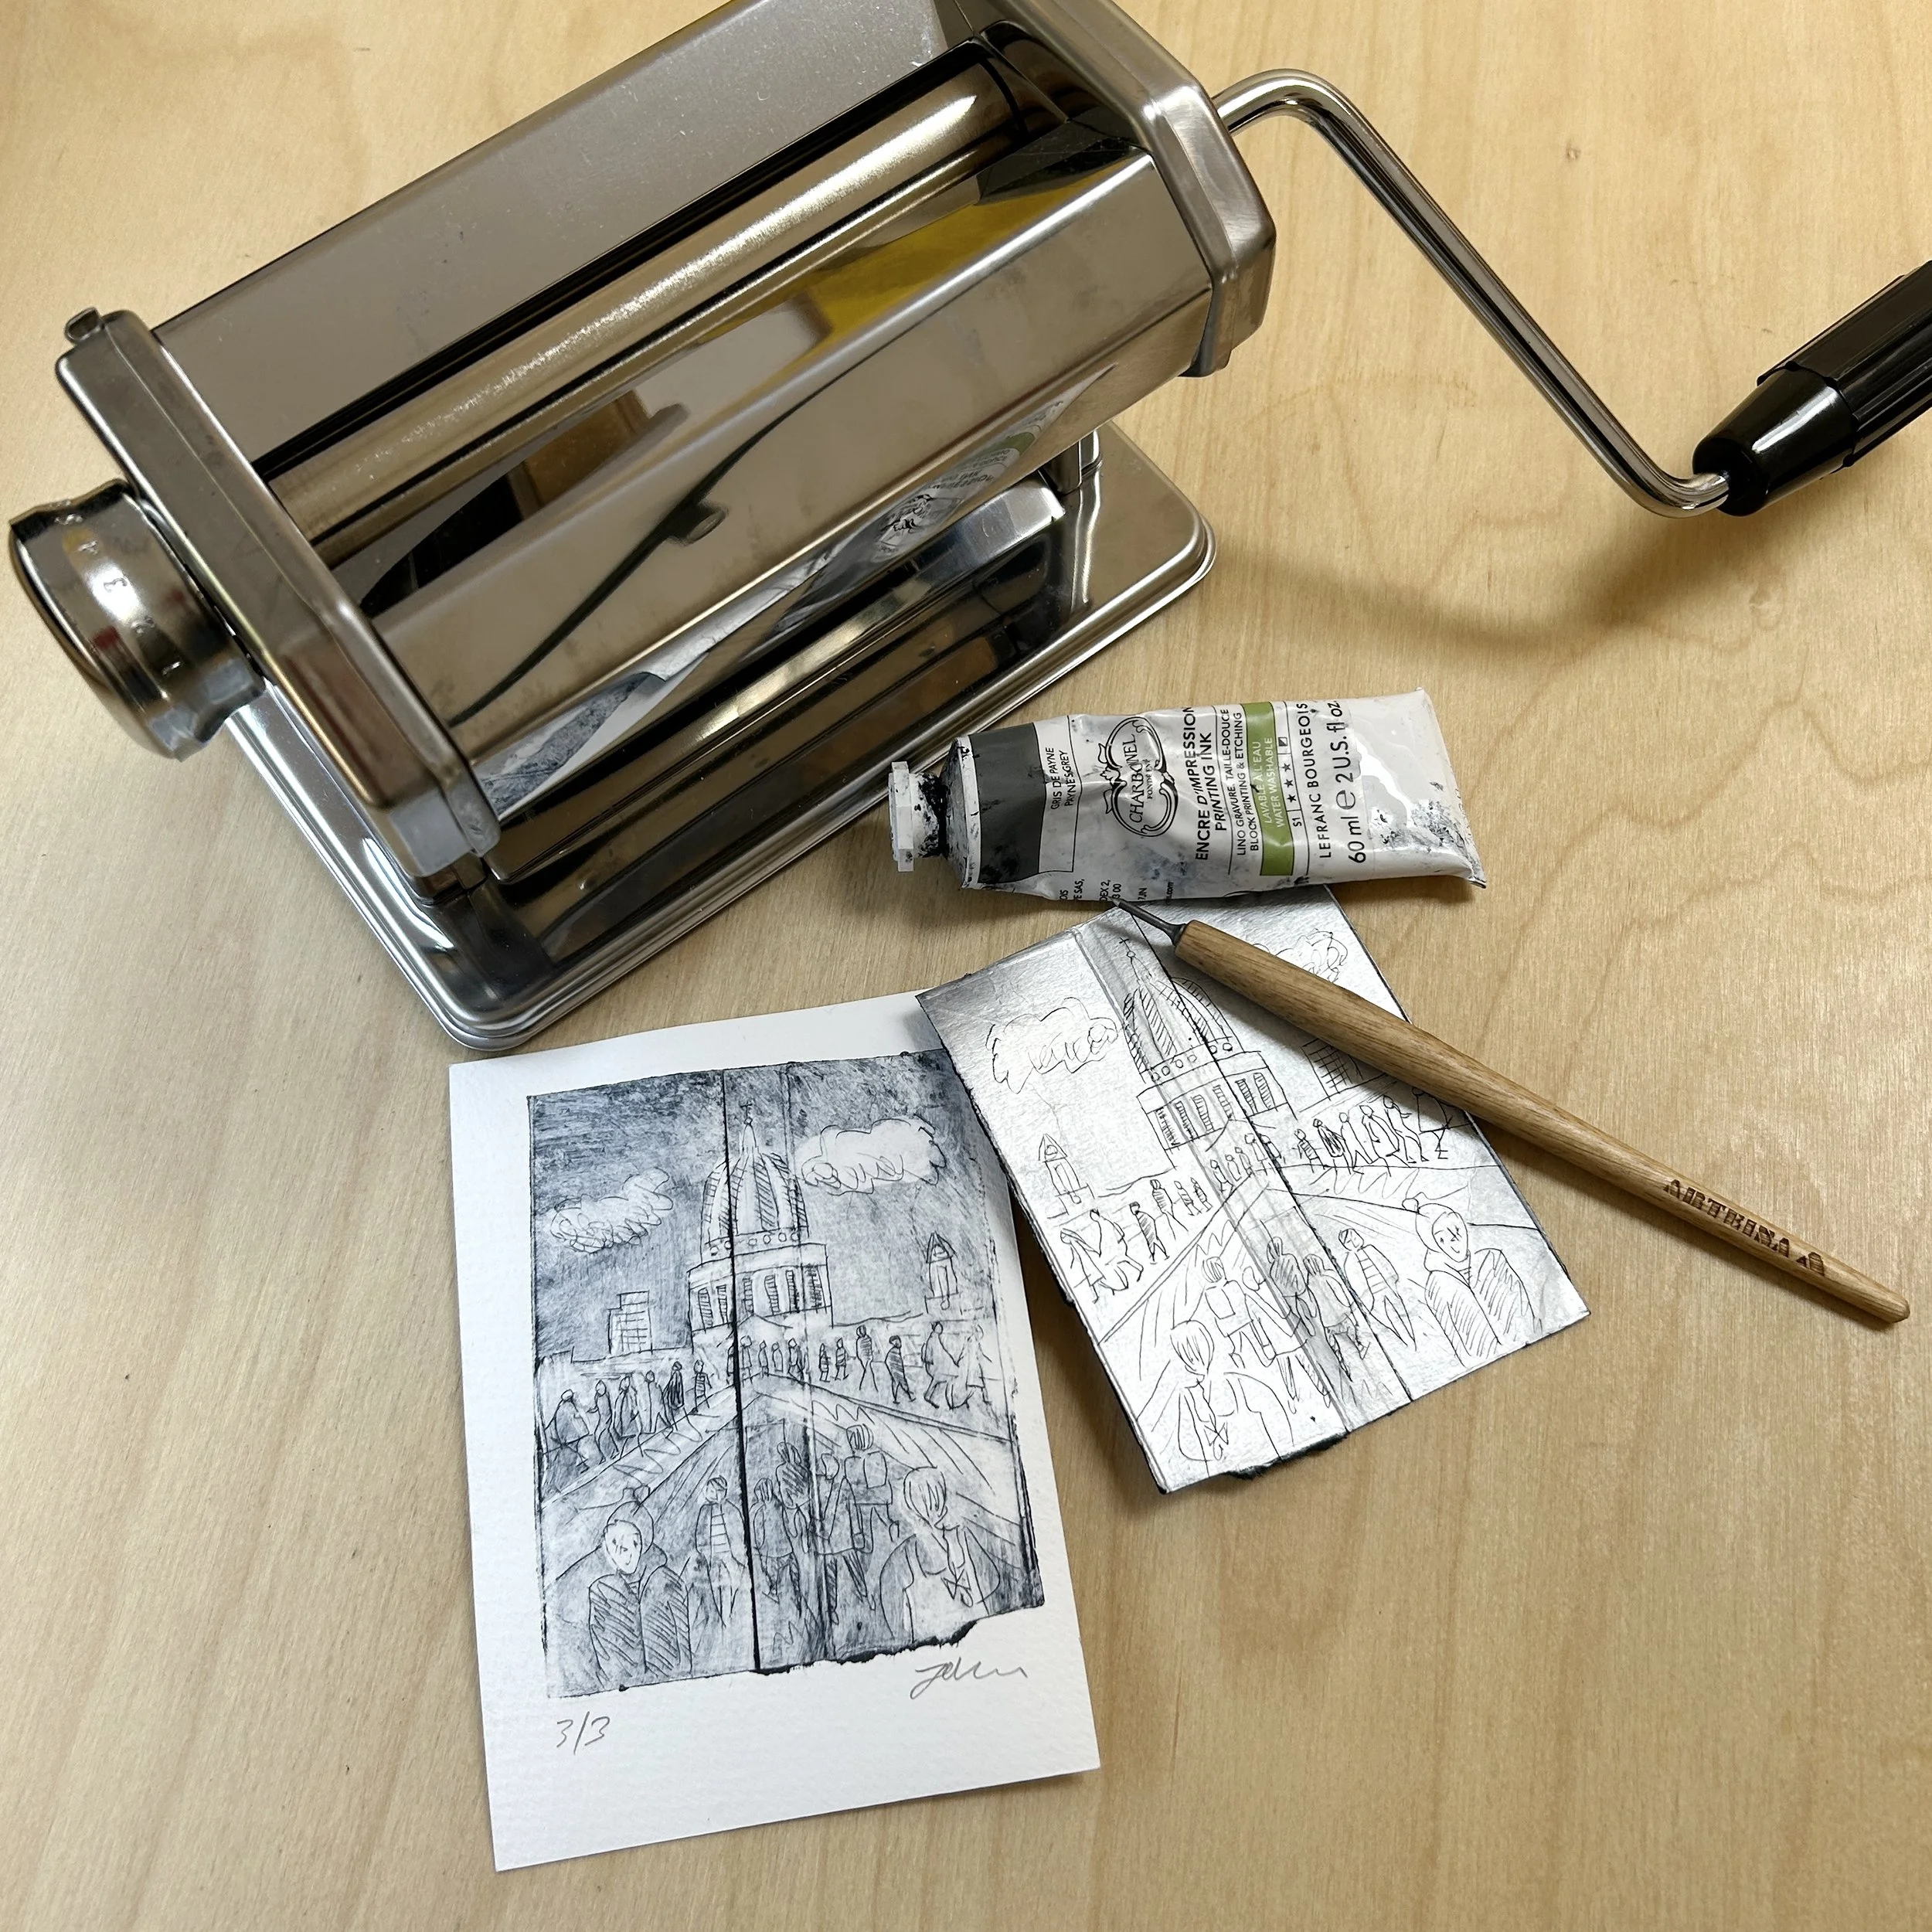
Pasta maker, etching ink, etching needle, cardboard plate and print
In this post I’m going to show you how to create dry point etchings using a pasta maker as a printing press and recycled cardboard Tetra Paks- such as milk and juice cartons as printing plates.
This can be a rather messy process and you may want to wear latex gloves and use newspaper to protect surfaces.

Clean the Tetra Paks before use
Clean the Tetra Paks before use and then cut them up to create your plates. You’ll be using the inside of the carton, with the shiny, metallic surface, to etch your design onto. Try experimenting with the folds in the cardboard to create creases or textures in your images.
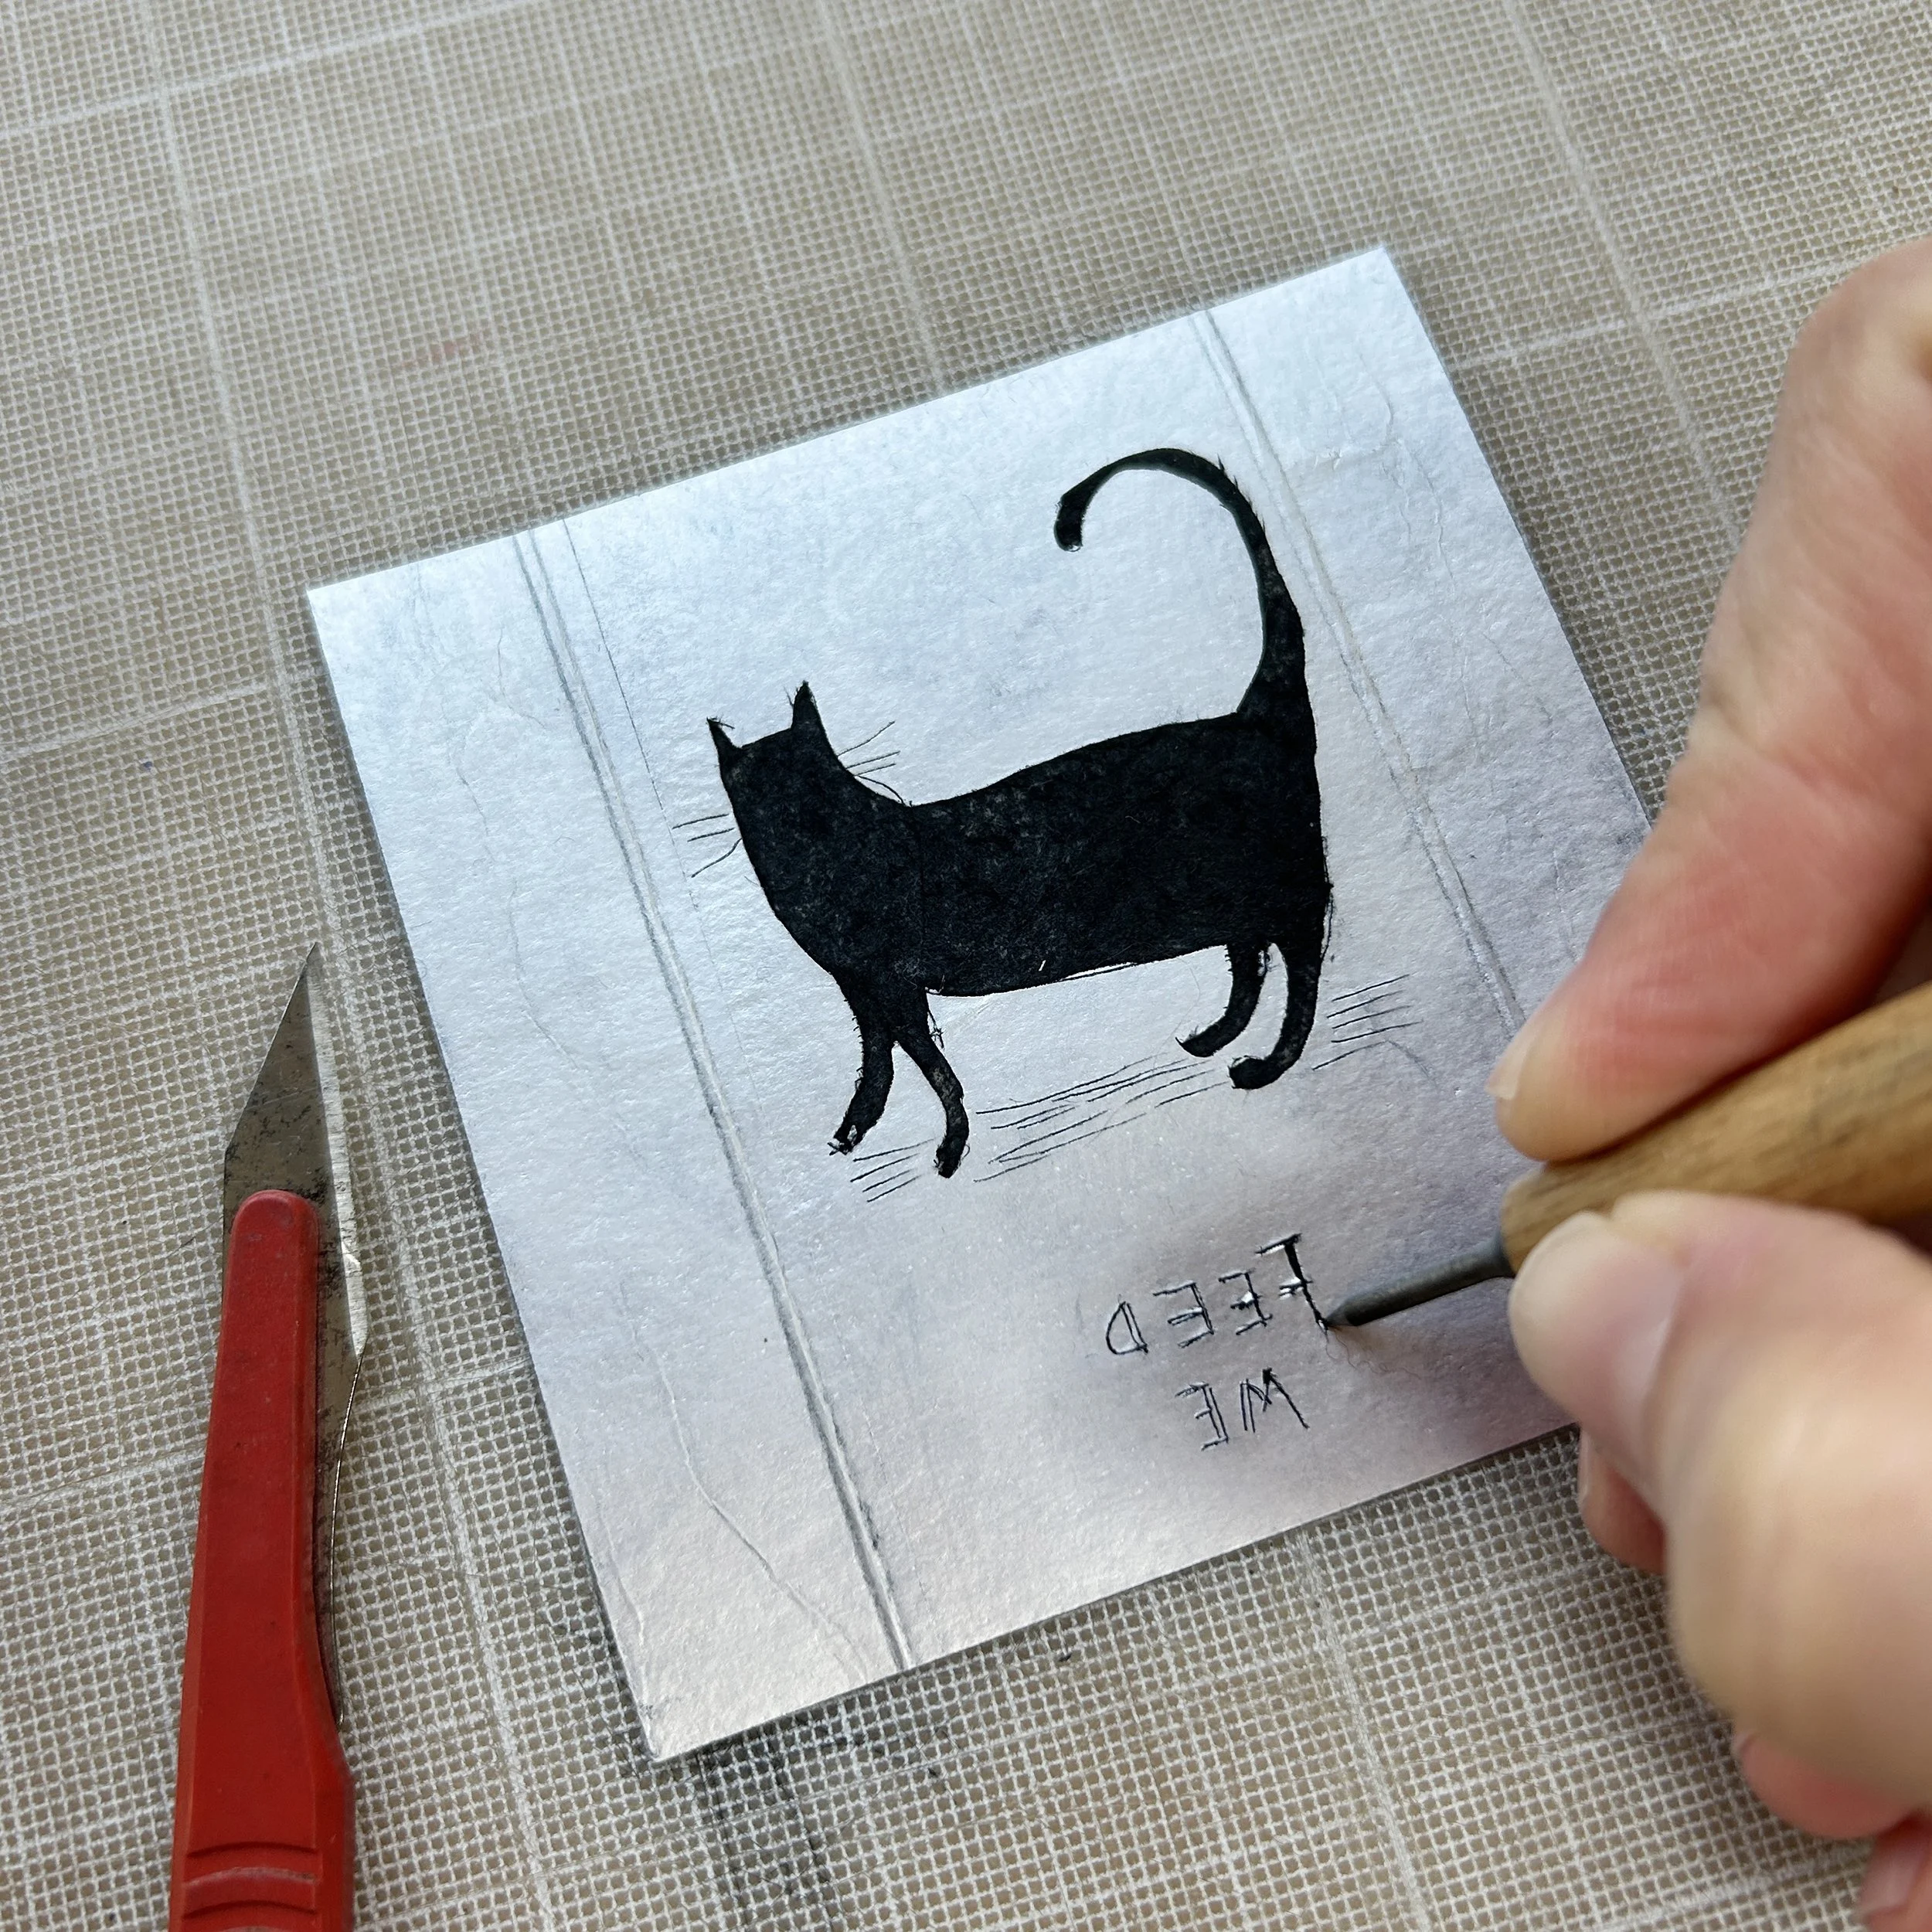
Using an etching tool & scalpel to carefully remove areas of the metallic surface
I transferred drawings from my sketchbooks, using tracing paper, onto the card and scratched the images into the cardboard with a sharp etching needle. I also used a scalpel to help me carefully remove larger areas of the metallic surface- such as the cat’s body in the image above.
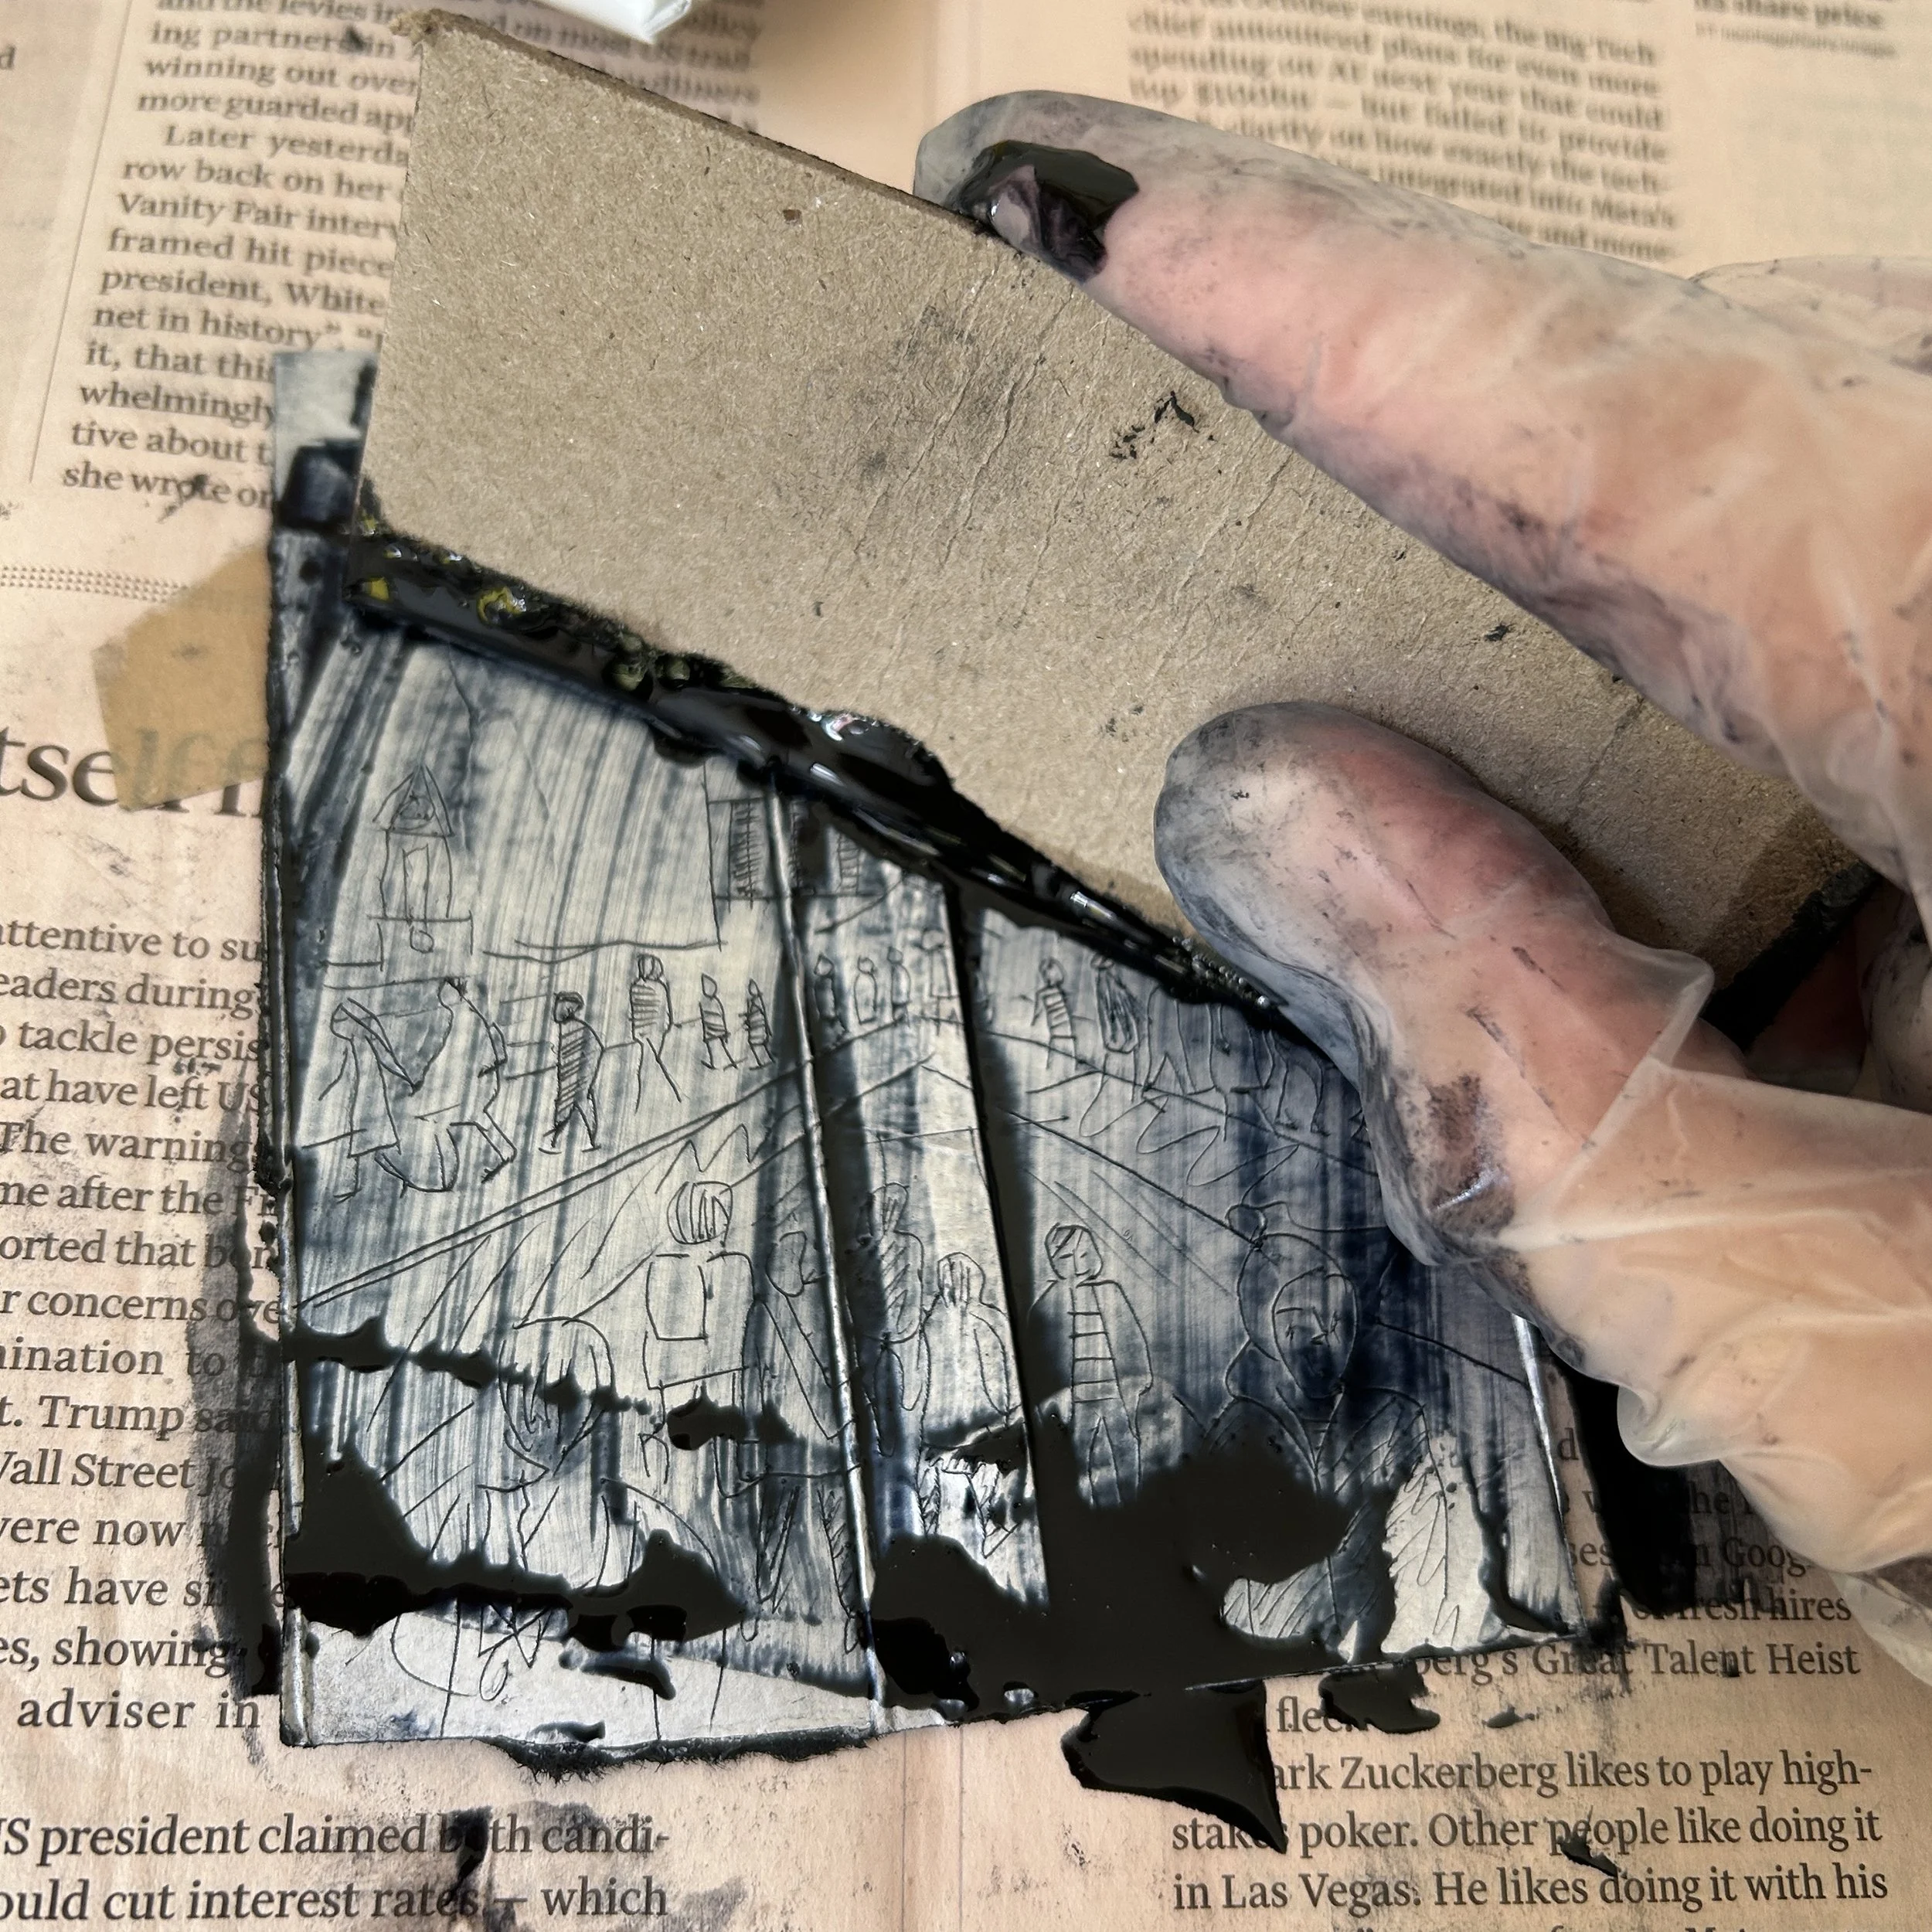
Scraping the ink into the groves using a piece of cardboard - this is messy- wear latex gloves if you don’t want to get dirty.
I then scraped etching ink into the design using a piece of strong cardboard (an old credit card would be better!) Use a cloth or kitchen roll to wipe excess ink away. When I’m wiping ink away I think of the cloth as a paint brush- using it to create texture in my image.
The ink I’m using is Charbonnele etching ink in payne’s grey
You can also use a cotton bud to wipe away ink from certain areas, if you want them to be white when printed.
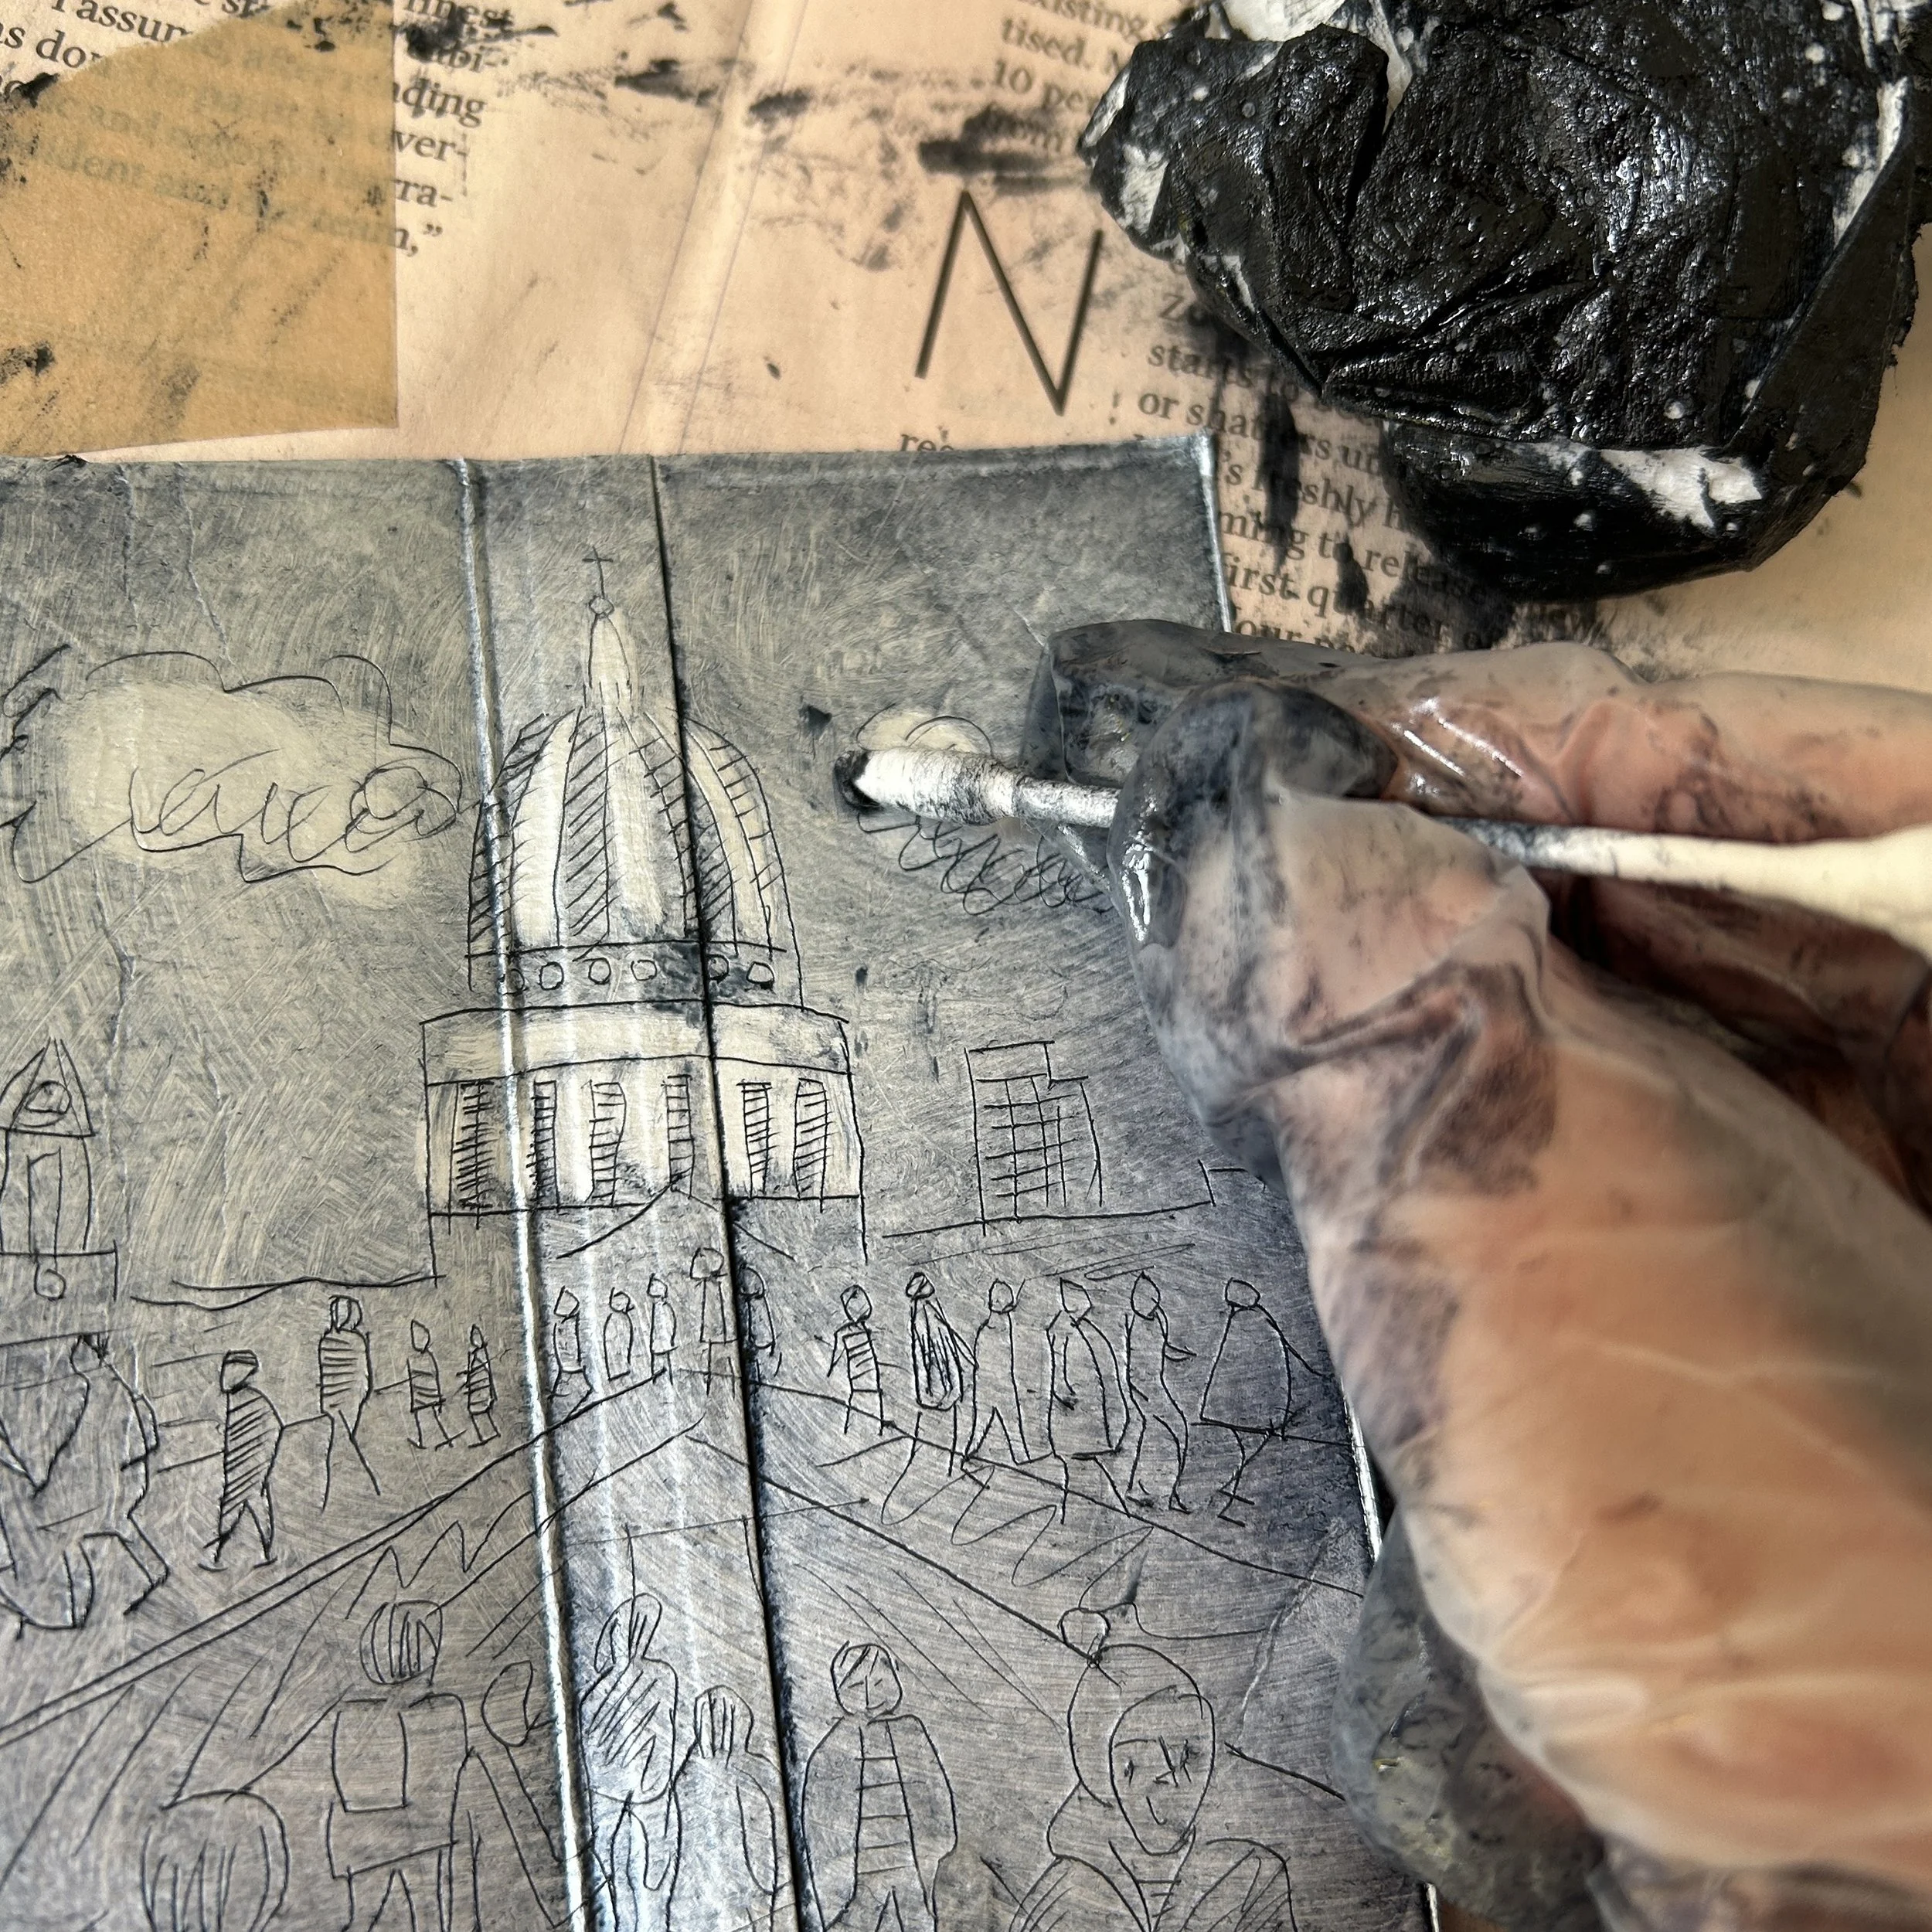
Removing ink from the clouds in this image with a cotton bud.
I’d recommend using watercolour paper to print the images onto. You need to soak the paper in a tray of water for a minute or two, then pat the paper down with some kitchen roll or a tea towel, so that’s it’s slightly damp- this allows the ink to adhere to the paper with ease.
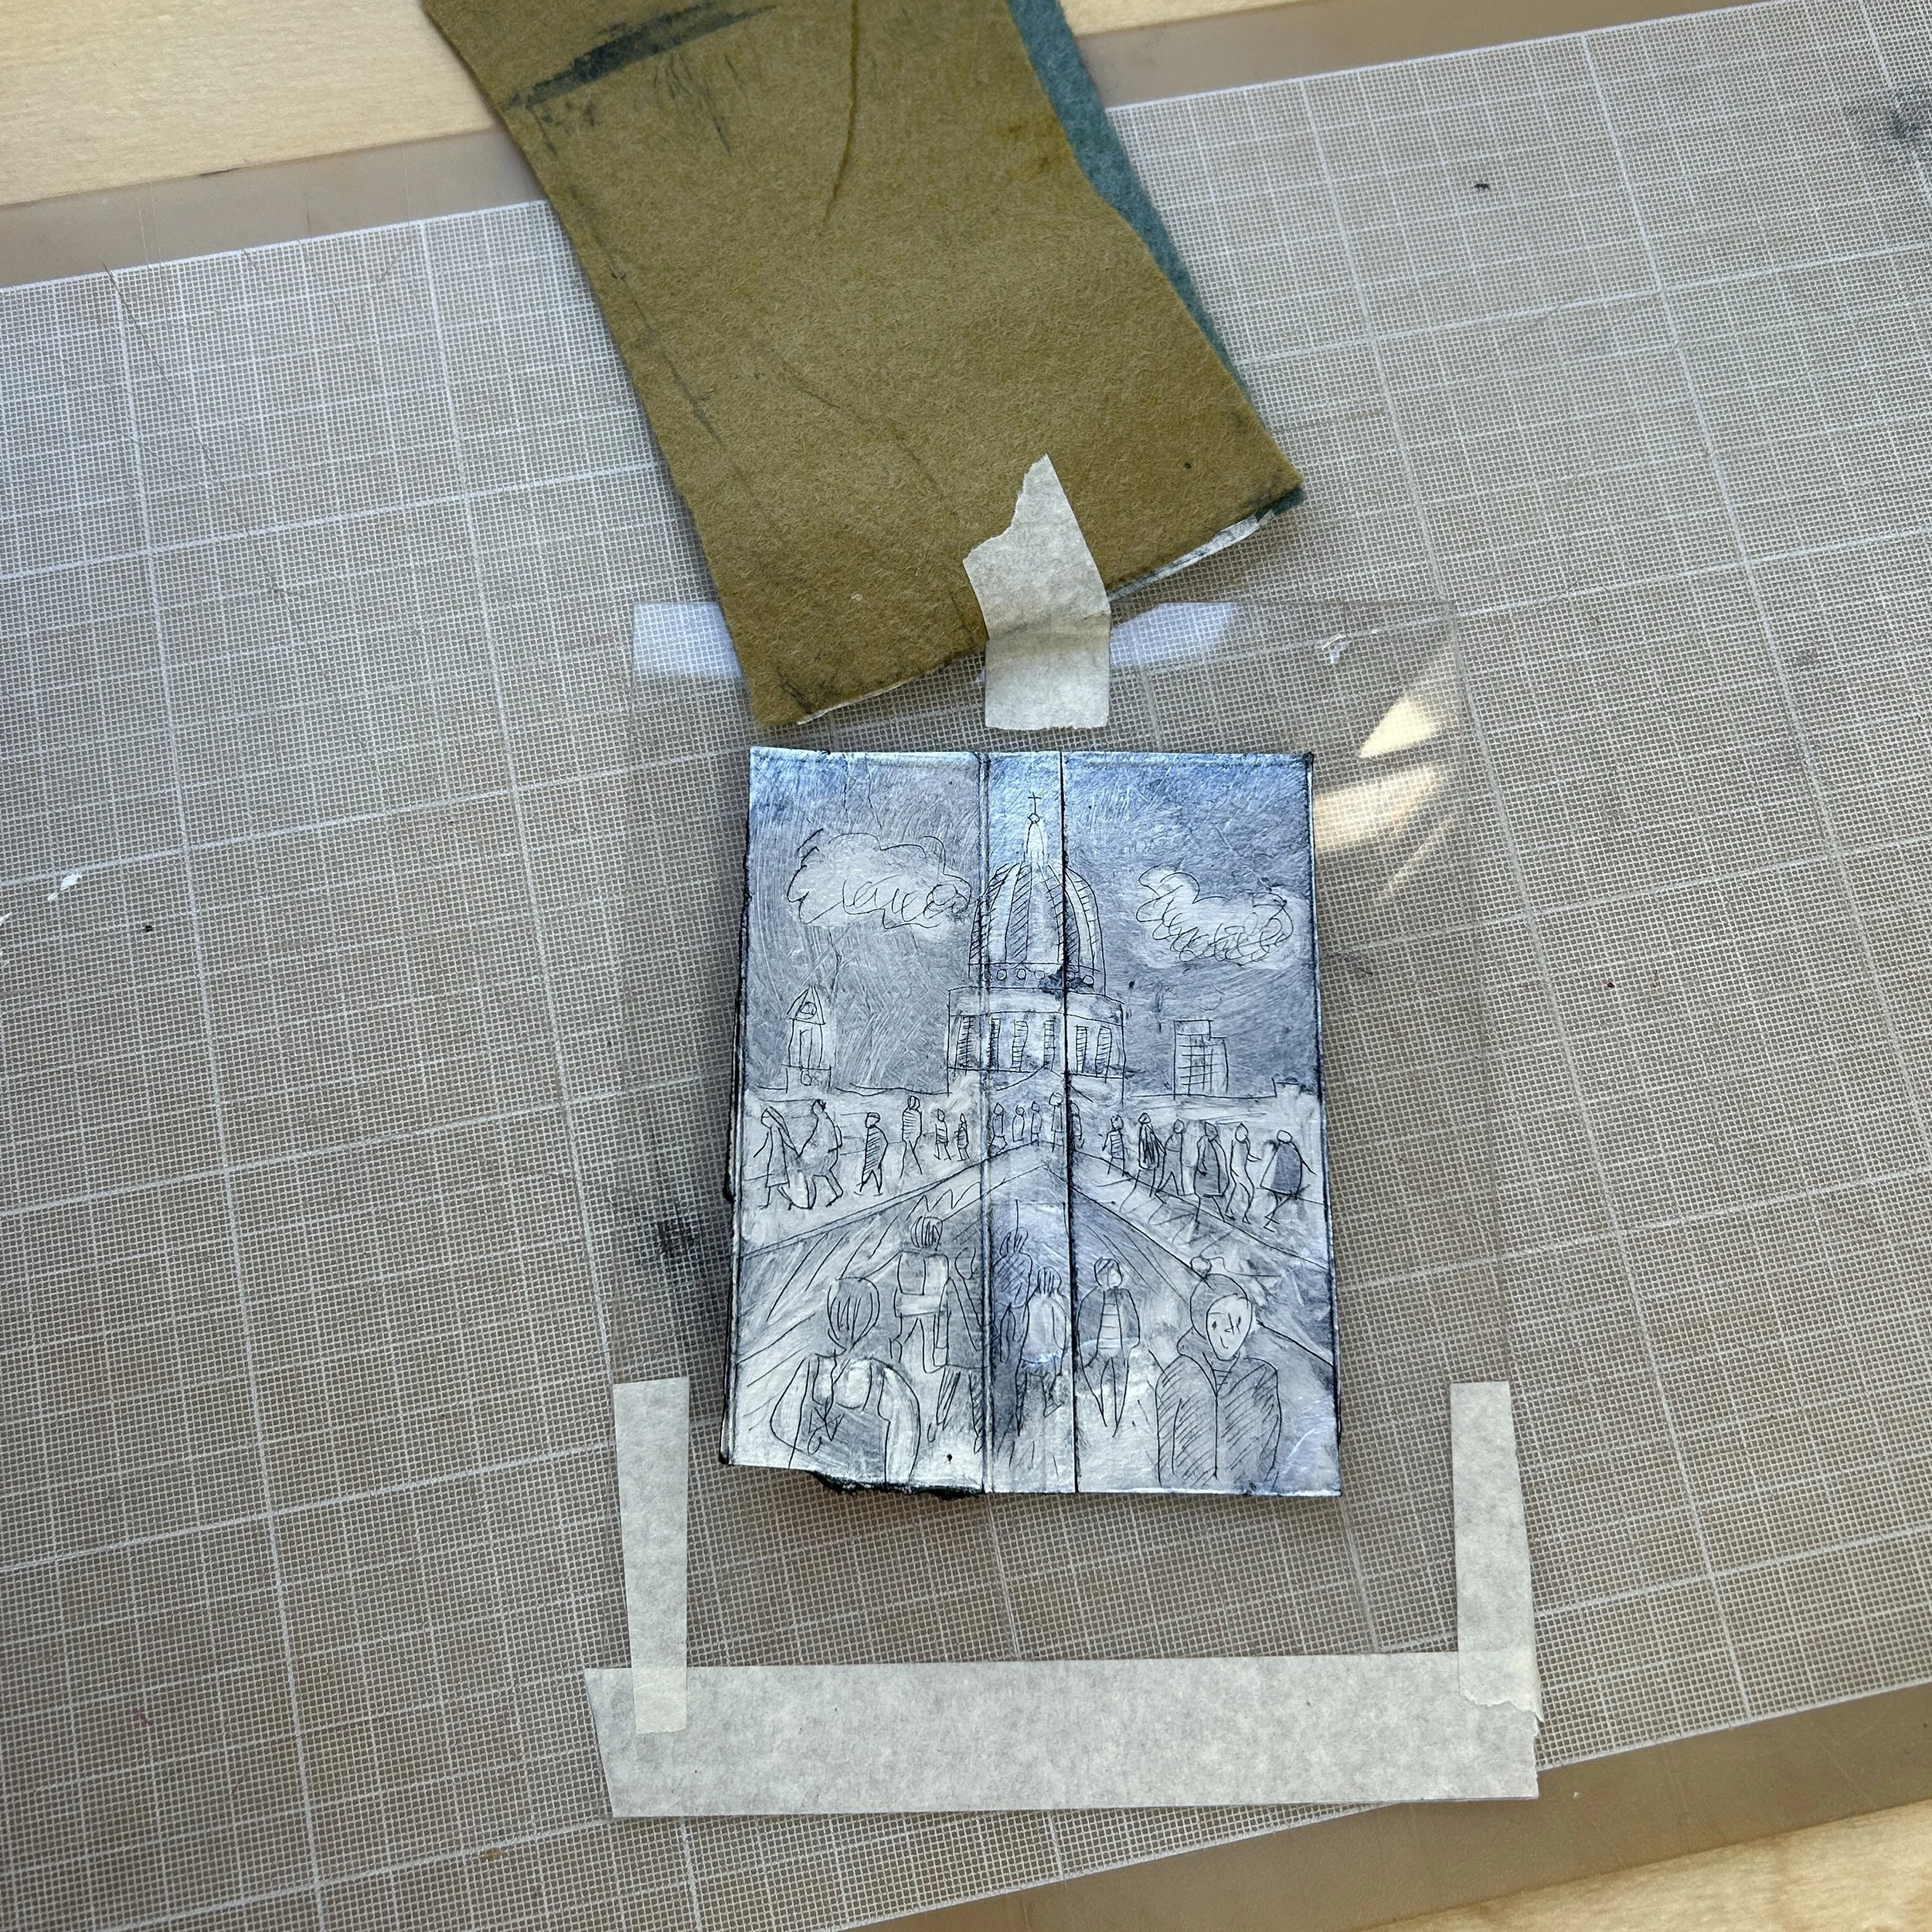
Inked up plate on perspex bed
Place your etching, ink side up, onto a a small piece of perspex. This will be your print bed (I’m using a perspex frame from a small, A5 Ikea picture frame) Your perspex needs to be small enough to fit through the pasta maker - which will be used as a press to imprint the image onto the paper.
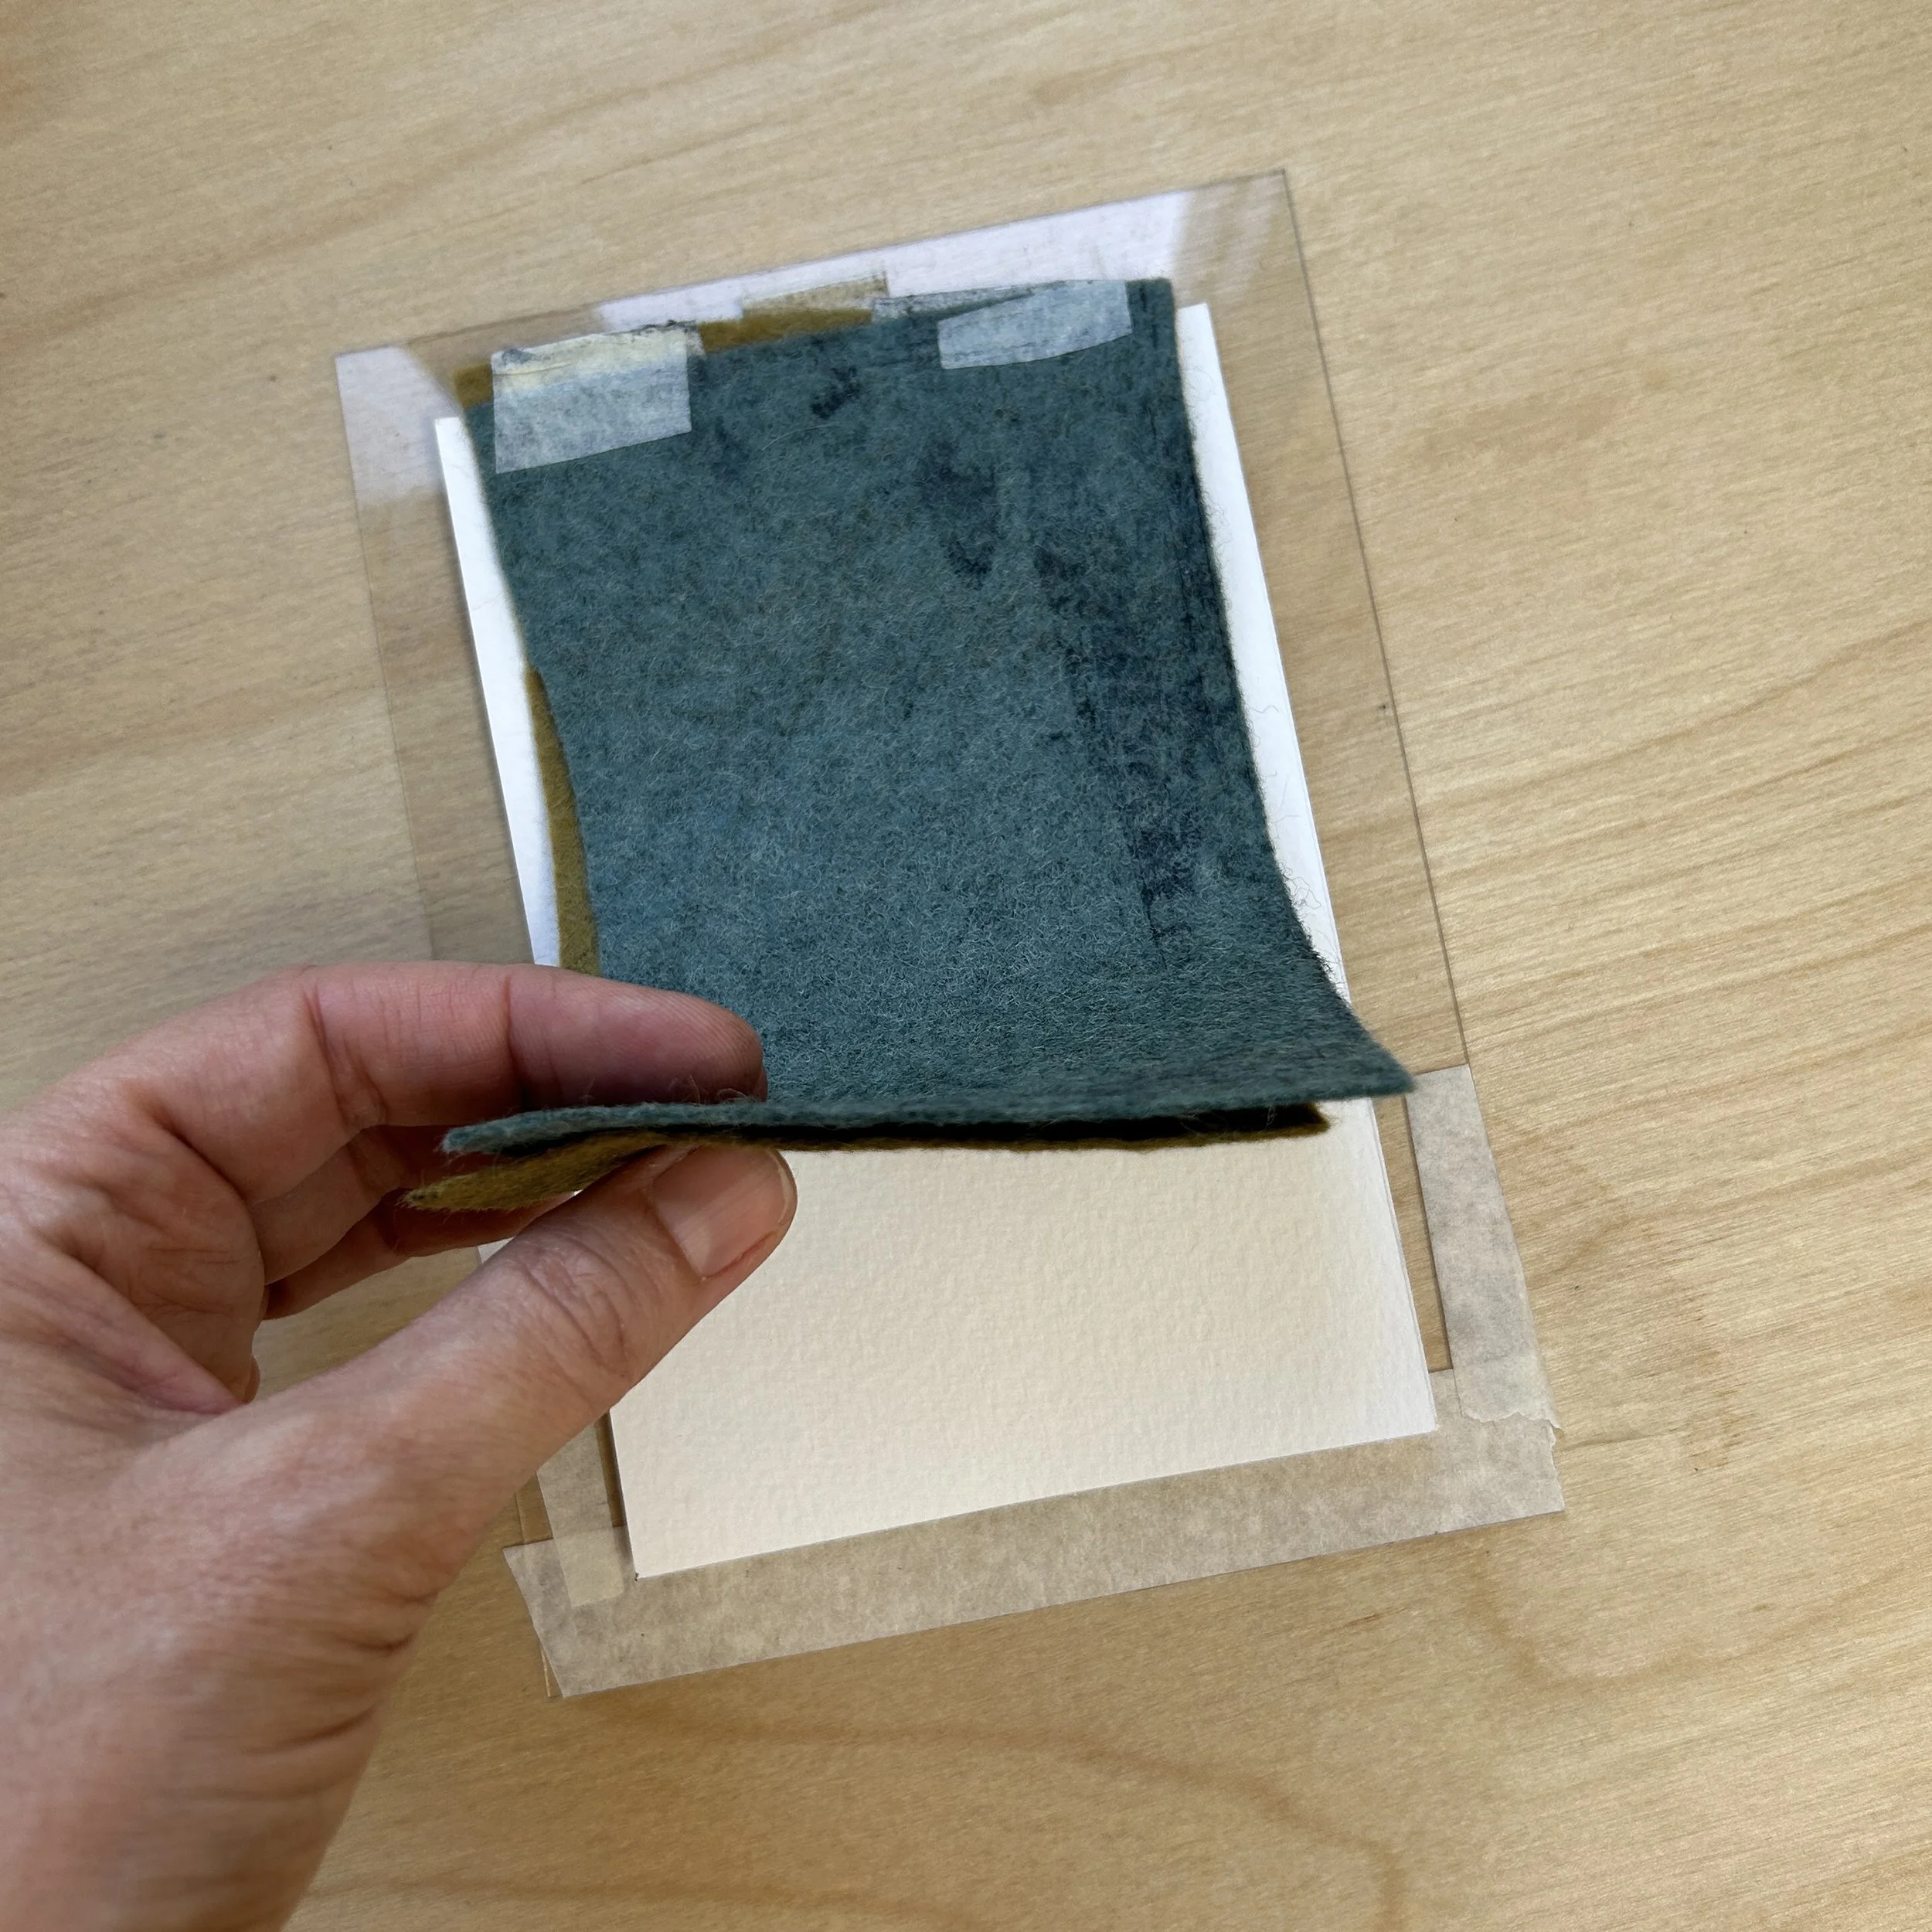
Place the paper on top of the inked up plate, and use felt to cushion it as it passes through the press
Place your damp paper on top of the inked up plate, and make a blanket with a couple of pieces of felt. This helps to cushion the print and distribute pressure evenly across your image. I attached the felt to the perspex bed using masking tape. Finally pass the print through your pasta maker, be careful that the perspex doesn’t splinter. Experiment with the settings on the side of your pasta maker, so the correct amount of pressure is applied.

Passing the print through your pasta maker
Remove your image from the printing bed and you have you finished print!
Because the cardboard degrades over time, each plate only yields a few prints. Every print is unique, with variations depending on the application and removal of ink during the process. You can watch a short video of this process here
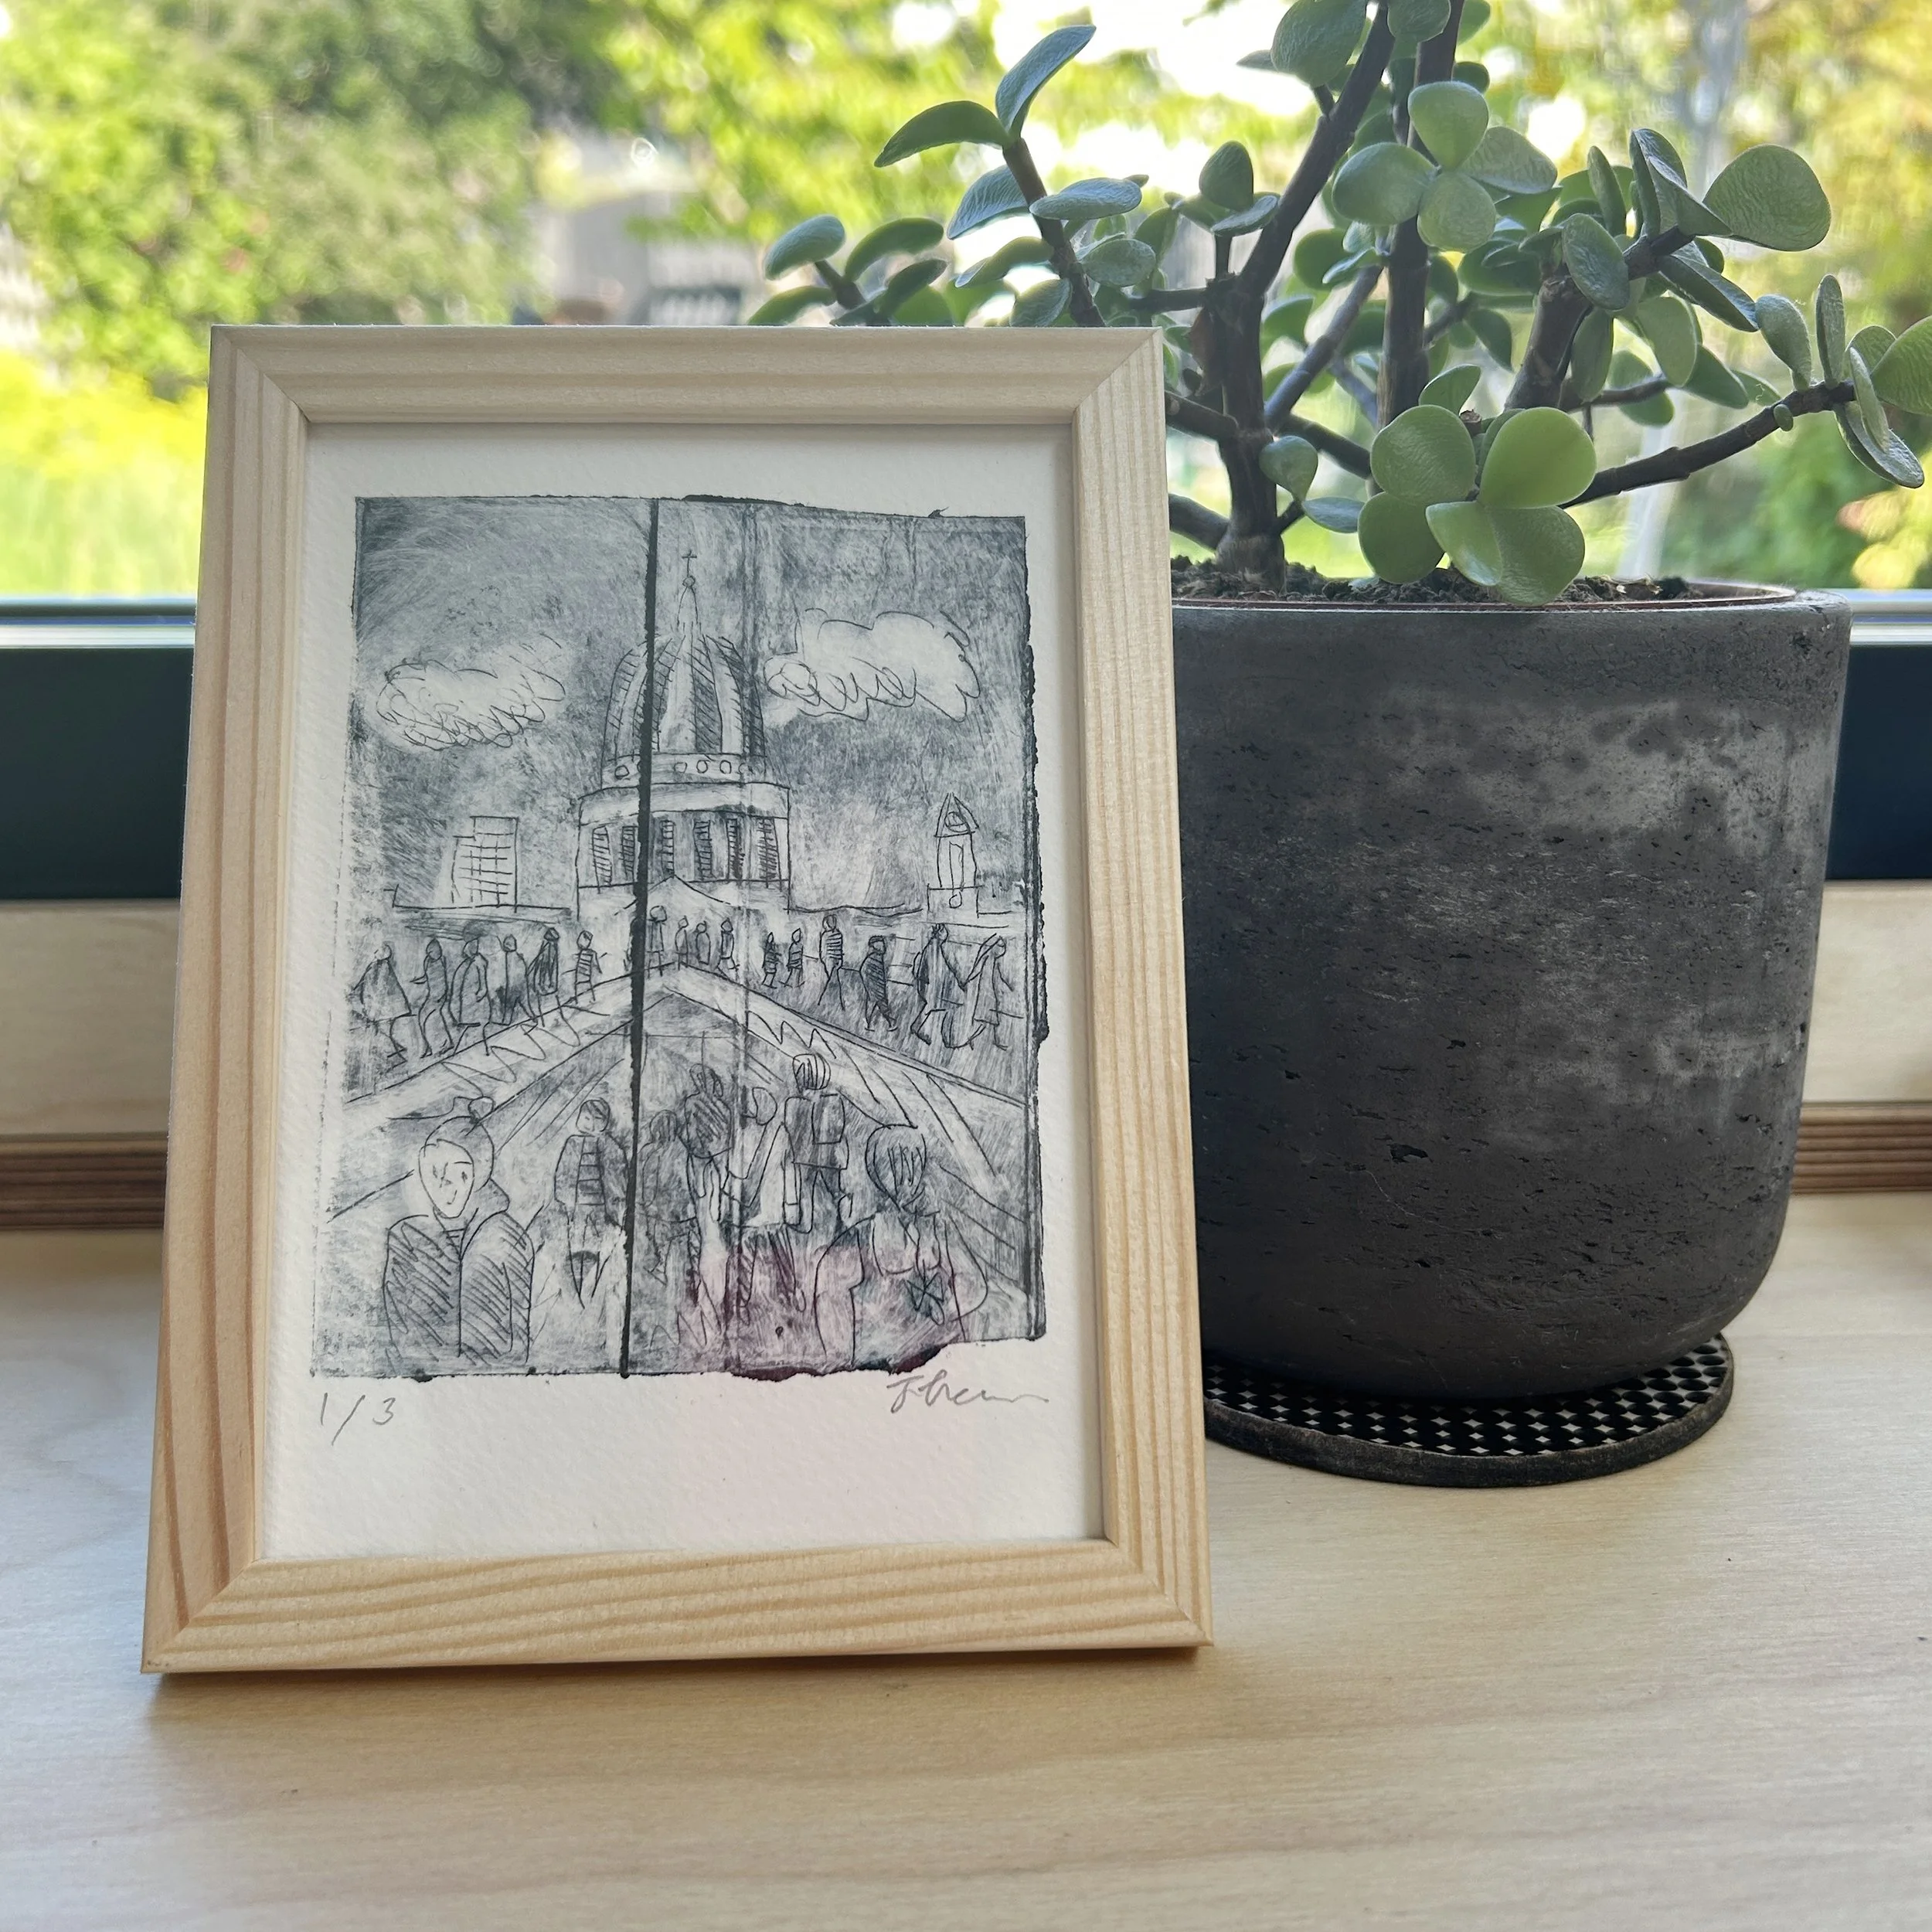
Framed St Pauls Cathedral etching
To see more of my dry point etchings you can visit my exhibition ‘Scratch The Surface’ 1-17 May, 2026 at Indulge Coffee, Highams Park, London E4 9LQ. The prints are available to buy here
